Cycling Elevation Calculator
Calculate Your Ride Difficulty
Estimate elevation gain based on your route distance and average grade. From the article: "For casual riders, aim for under 50 meters of elevation per 10 kilometers. For training rides, 100–150 meters is manageable."
Example: The Bow River Pathway from Bowness to the Zoo has almost zero climb. The route from Mission to Fish Creek Park? Expect 120 meters of climb over 12 km.
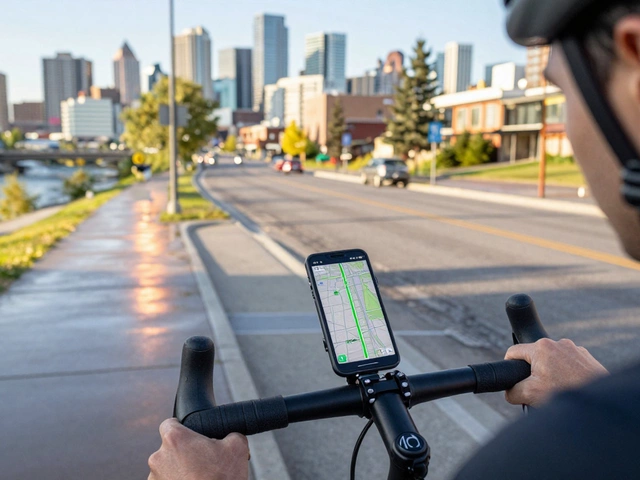
Planning a cycling route shouldn’t feel like solving a puzzle with half the pieces missing. Whether you’re riding to work, exploring local trails, or training for a weekend ride, Google Maps can do more than just show you the shortest way from point A to point B-it can help you find the safest, flattest, and most scenic paths on two wheels. But most people use it wrong. They pick the car route and hope for the best. That’s how you end up on a busy four-lane road with no bike lane, or worse, a steep hill you didn’t sign up for.
Start with the right mode: biking, not driving
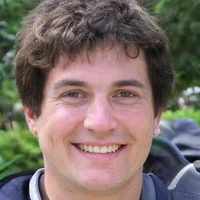
Open Google Maps on your phone or computer. Type in your starting point and destination. Then, click the icon that looks like a bicycle-it’s right next to the car and walking icons. Don’t skip this step. If you leave it on driving mode, Google Maps will route you through highways, roundabouts, and intersections designed for cars, not bikes. Switching to biking mode tells the app to prioritize bike lanes, multi-use paths, and quieter streets. In Calgary, that means it’ll favor the Bow River Pathway, the Nose Hill Trail, or the 17th Avenue SE bike lanes instead of 16th Avenue NW during rush hour.Use the layer feature to see bike infrastructure
After you’ve selected biking mode, look for the menu button in the top-left corner (three horizontal lines). Tap it, then scroll down and select “Bicycling.” This turns on a special layer that shows you exactly where bike lanes, shared paths, and bike-friendly roads are. You’ll see green lines for dedicated bike paths, dashed lines for shared roads, and dotted lines for recommended but unmarked routes. In Calgary, this layer highlights the extensive pathway network along the Elbow River and the connection from Inglewood to the Calgary Stampede grounds. If you don’t see green lines, you’re probably on a road that’s not ideal for cycling-even if Google says it’s the fastest.Check elevation before you commit
One of the biggest mistakes cyclists make is assuming flat equals easy. Google Maps shows elevation changes, but you have to know where to look. After you’ve plotted your route, click on the route line. A small panel pops up with distance, time, and elevation gain. If you’re planning a 10-kilometer ride and see 200 meters of climb, that’s a serious effort-especially if you’re commuting after work. For casual riders, aim for under 50 meters of elevation per 10 kilometers. For training rides, 100-150 meters is manageable. The Bow River Pathway from Bowness to the Zoo has almost zero climb. The route from Mission to Fish Creek Park? Expect 120 meters of climb over 12 km. Know what you’re signing up for.Adjust for weather and time of day
Google Maps doesn’t automatically factor in weather, but you should. If it’s snowing or icy, avoid shaded paths and bridges-those freeze first. In Calgary, the path under the Deerfoot Trail overpass is notorious for black ice in winter. Stick to sun-exposed roads or paved trails. If you’re riding at dusk, avoid poorly lit areas. Google Maps doesn’t show streetlight coverage, but you can spot dark zones by looking at satellite view. If the area looks like a tunnel of trees with no buildings nearby, it’s probably not well lit. Use the street view feature to preview the route. Just drag the little yellow peg onto the map. You’ll see real photos of the road ahead. Is there a bike lane? Are there parked cars blocking the path? Is there a steep curb at the intersection? These details matter.
Save and share your route
Once you’ve got a route you like, don’t just leave it on the screen. Tap the three dots next to the route summary and select “Save to list.” You can create a list called “Weekend Rides” or “Commute Routes.” Later, you can open it from your profile and reload the route with one tap. You can also share the route via text or email. That’s handy if you’re riding with someone. Just send them the link. They’ll see the exact path, elevation, and turn-by-turn directions. No more guessing at corners or missing turns because you forgot to check the map.Combine with local knowledge
Google Maps is great, but it’s not perfect. It doesn’t know about temporary closures, construction, or seasonal trail access. In Calgary, the pathway from Shawnessy to Somerset gets blocked every spring due to flooding. The route from Seton to the Calgary Zoo is closed for repairs every October. Local cycling groups like Calgary Bike Coalition or Facebook groups like “Calgary Cyclists” post real-time updates. Use Google Maps to plan, then cross-check with local sources. A route that looks perfect on the map might be a detour in reality.Test it before you go far
Never ride a new route all the way on your first try. Pick a small section-maybe 3 to 5 kilometers-and ride it during off-hours. See how the pavement feels. Are there potholes? Is the bike lane narrow? Do cars pass too close? Does the intersection have a bike signal? I once planned a 25-kilometer loop through the northeast that looked great on Google Maps. Turned out, the last 2 kilometers had no bike lane and a blind curve with speeding traffic. I walked my bike the rest of the way. Test small. Learn fast.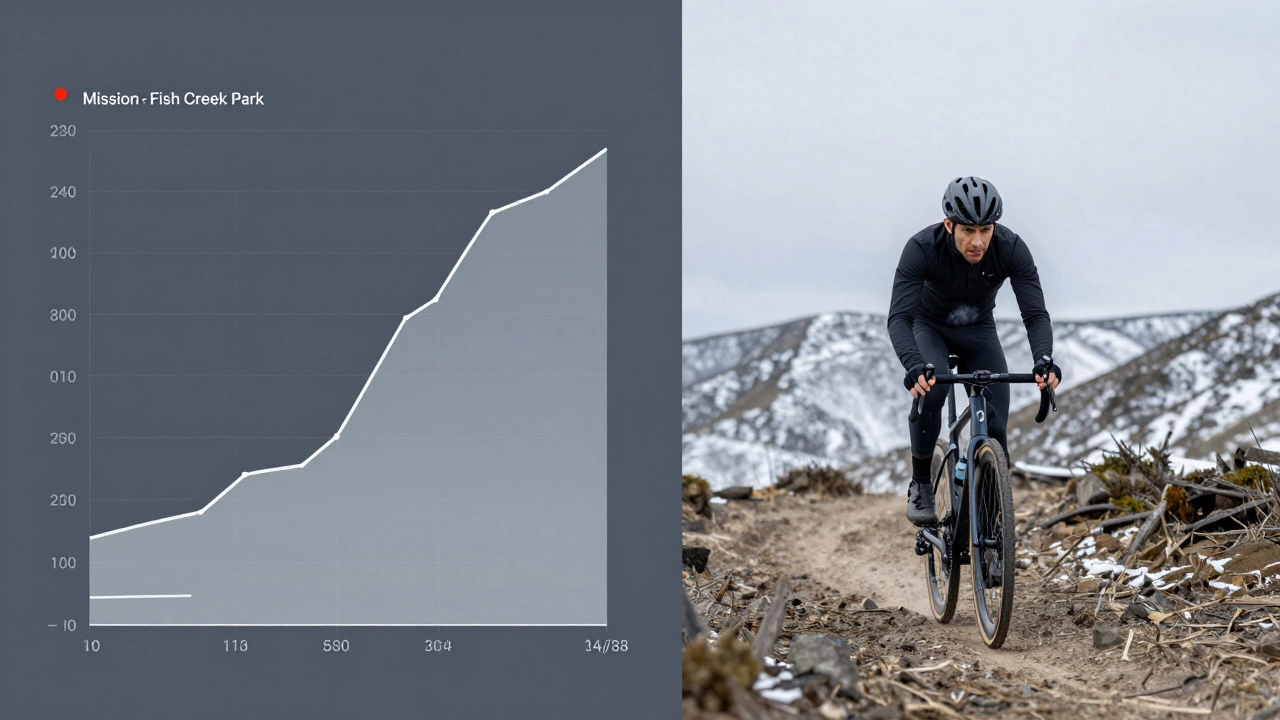
Use offline maps for remote rides
If you’re heading out to the foothills or the Bow Valley, cell service can drop. Google Maps lets you download maps for offline use. Open the app, search for your destination, tap the address, then click “Download.” The app saves the map, including bike routes, for when you’re out of range. You’ll still get turn-by-turn directions, even without data. Just make sure you’ve downloaded the right area. Don’t assume the map includes trails-you might need to zoom in and manually select the region you want to save.Why this works better than dedicated bike apps
There are apps like Komoot, Strava, and RideWithGPS that specialize in cycling. They’re great for logging rides or finding popular trails. But for everyday route planning, Google Maps wins because it’s always updated, integrates with traffic and weather, and works on any phone. It doesn’t require a subscription. It doesn’t force you into a community feed. It just shows you the way. And when you combine it with the biking layer, elevation data, and street view, you’ve got a tool that’s smarter than most dedicated apps.What not to do
Don’t rely on the “fastest” route. That’s usually the car route with a bike icon slapped on. Don’t ignore elevation. Don’t skip street view. Don’t assume all bike lanes are safe-some are just painted lines next to parked cars. And don’t forget to lock your phone in a mount. You’re not going to hold it up while riding.Can Google Maps show me bike lanes in Calgary?
Yes. After selecting biking mode, turn on the “Bicycling” layer in the menu. This shows green lines for dedicated bike paths, dashed lines for shared roads, and dotted lines for recommended routes. Calgary’s pathway network along the Bow and Elbow Rivers is clearly marked.
Why does Google Maps sometimes send me on roads with no bike lanes?
If you’re not using the biking mode or the bicycling layer, Google Maps defaults to car routing. Even in biking mode, if there’s no safe alternative, it may route you on low-traffic roads without dedicated lanes. Always check the map layer and elevation to confirm the route suits your comfort level.
How accurate is the elevation data on Google Maps for cycling?
It’s reasonably accurate for most urban and suburban routes in Calgary. For trail rides in the foothills, it can be off by 5-10%. Use it to compare routes, not for precise training metrics. If you need exact numbers, pair it with a GPS watch or app like Strava.
Can I use Google Maps offline for cycling in rural areas?
Yes. Download the map area before you leave. Open the route, tap the address, then select “Download.” The app saves the route and map data, including bike paths, for offline use. You’ll still get turn-by-turn directions without cell service.
Is it safe to rely on Google Maps for winter cycling in Calgary?
Use it with caution. Google Maps doesn’t show ice, snow buildup, or plowing schedules. Avoid shaded paths, bridges, and underpasses in winter. Stick to main roads that are plowed regularly. Always cross-check with local cycling groups for real-time conditions.
You might like